How to Get a Vietnam Visa Online from Singapore
One of the best parts of living in Singapore is how cheap and easy it is to travel around Southeast Asia. Vietnam is a great example. Plenty of flights connect Singapore to Ho Chi Minh City, Hanoi, and beyond, often for very little.
If you are a history lover, a food explorer, or just someone planning a Vietnam trip, this guide walks you through getting a Vietnamese tourist visa online, even while you are on a work pass in Singapore. Here is how I did it.
The short version:
- You can apply for a single or multiple-entry visa online.
- The single-entry fee is about 33 SGD (USD 25).
- Processing usually takes about three days.
- The Vietnamese Immigration Department decides the validity, up to a maximum of 90 days.
Check if you need a visa
If you are a citizen of one of the countries on the exemption list, you do not need a visa before you visit. This guide is for those who do need a visit visa, meaning countries not on that list.
https://www.vietnam-visa.com/vietnam-visa-exemption/
Gather your documents
Before you start the online form, get these ready.
Passport. Valid for more than six months from your intended visit. Scan the bio page and save it as .jpeg or .jpg, under 1MB. If you only have a PDF, take a clear screenshot of the bio page and save it in the right format. Make sure every detail is legible.
Photo. 40mm wide by 60mm high, no border, taken within the last six months. Save as .jpeg or .jpg, under 1MB, clear and high quality. Selfie photos are not accepted.
Address in Vietnam. Have the full address of your hotel ready. If you copy it from Booking.com or a similar site, double-check it against Google, because sometimes the listed address is only part of the full one. Note there is no place to attach the hotel booking in the e-visa form.
You do not need your flight ticket ready to apply.
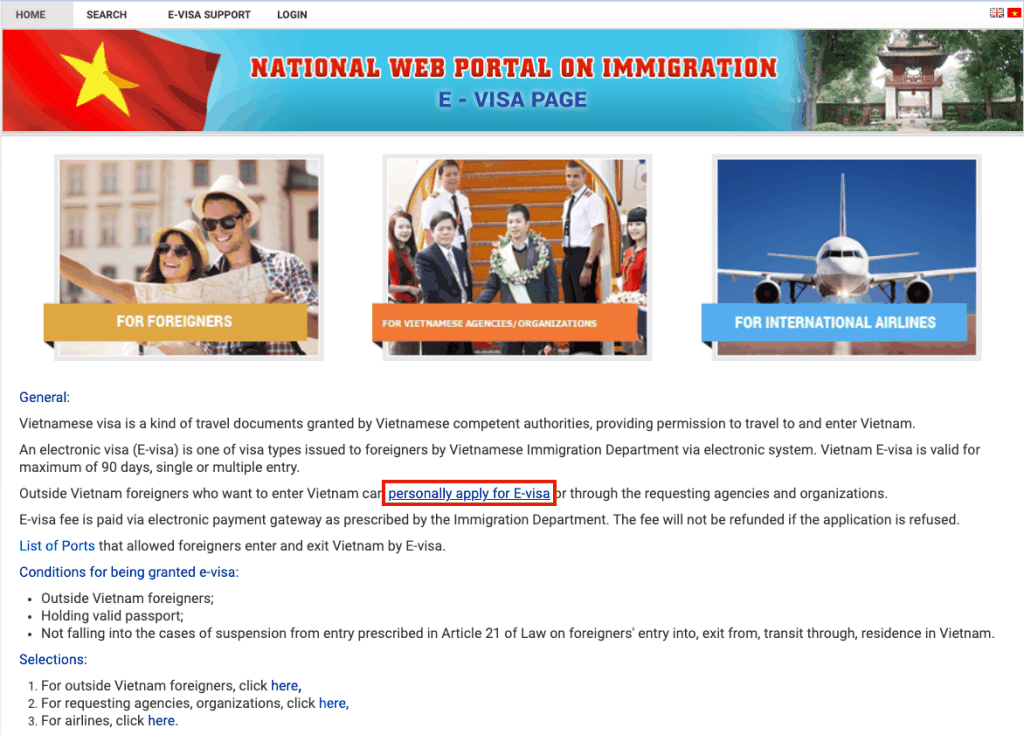
Step 1: Open the official e-visa portal
Go to the Vietnamese Immigration Department’s official e-visa portal: https://evisa.xuatnhapcanh.gov.vn/trang-chu-ttdt

Step 2: Start the application
Click personally apply for E-visa. Read the page, confirm you have read it, and click Next.
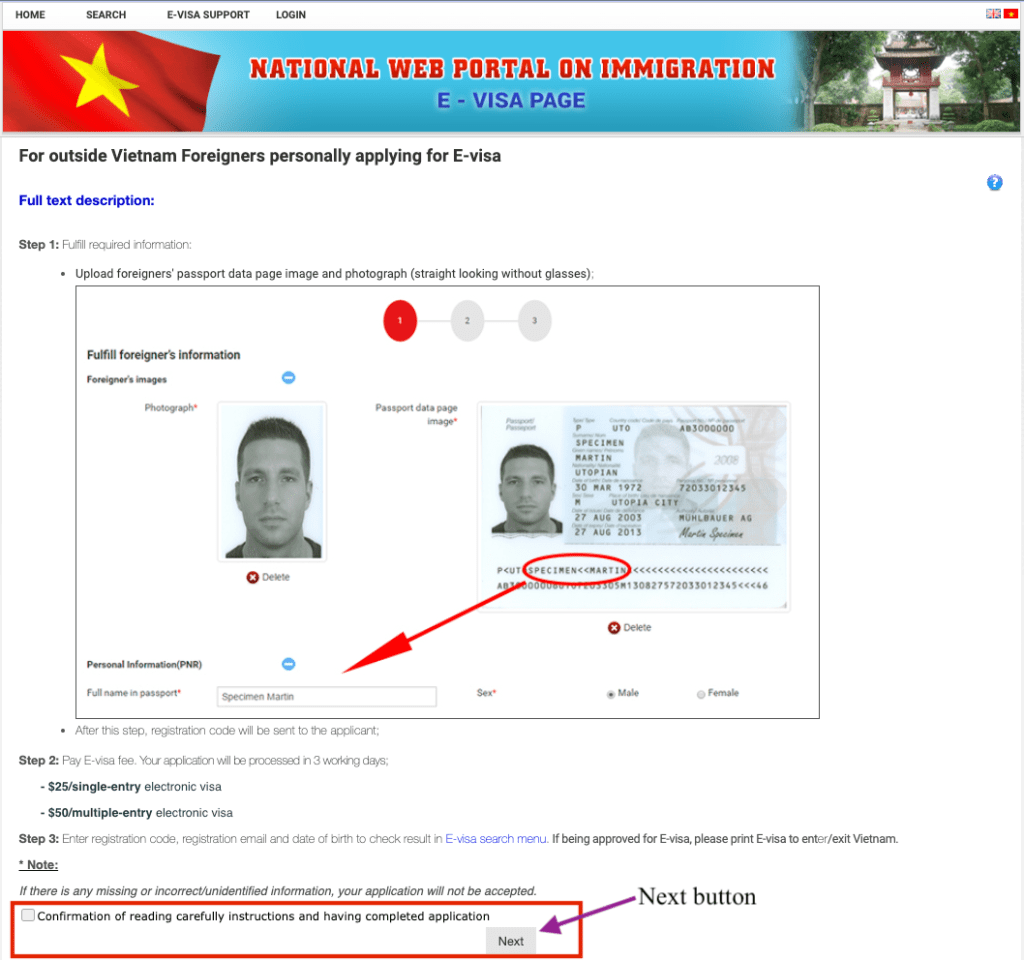
Step 3: Upload photo and passport, enter your details
Upload your photo and passport bio page, then fill in your personal details. For the ID card number, you can use your FIN number if you are in Singapore, or your local ID number otherwise. It is not a mandatory field.
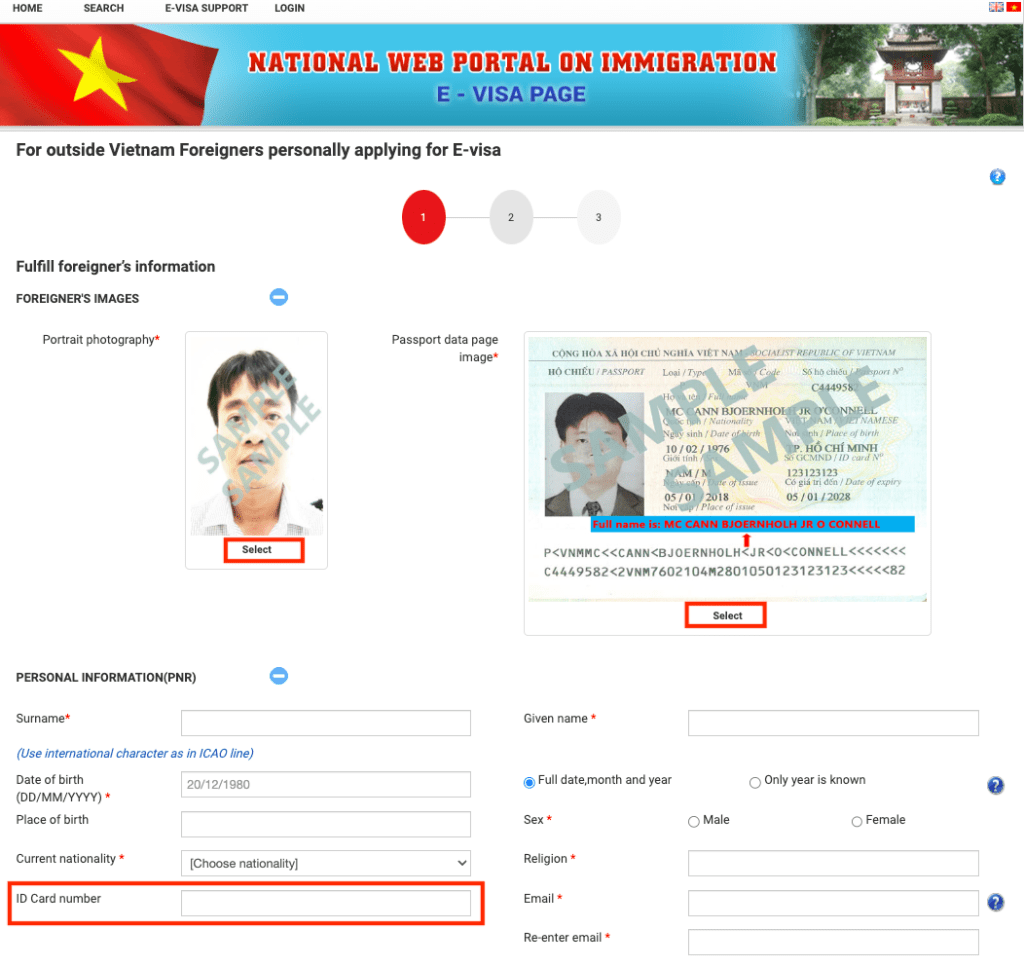
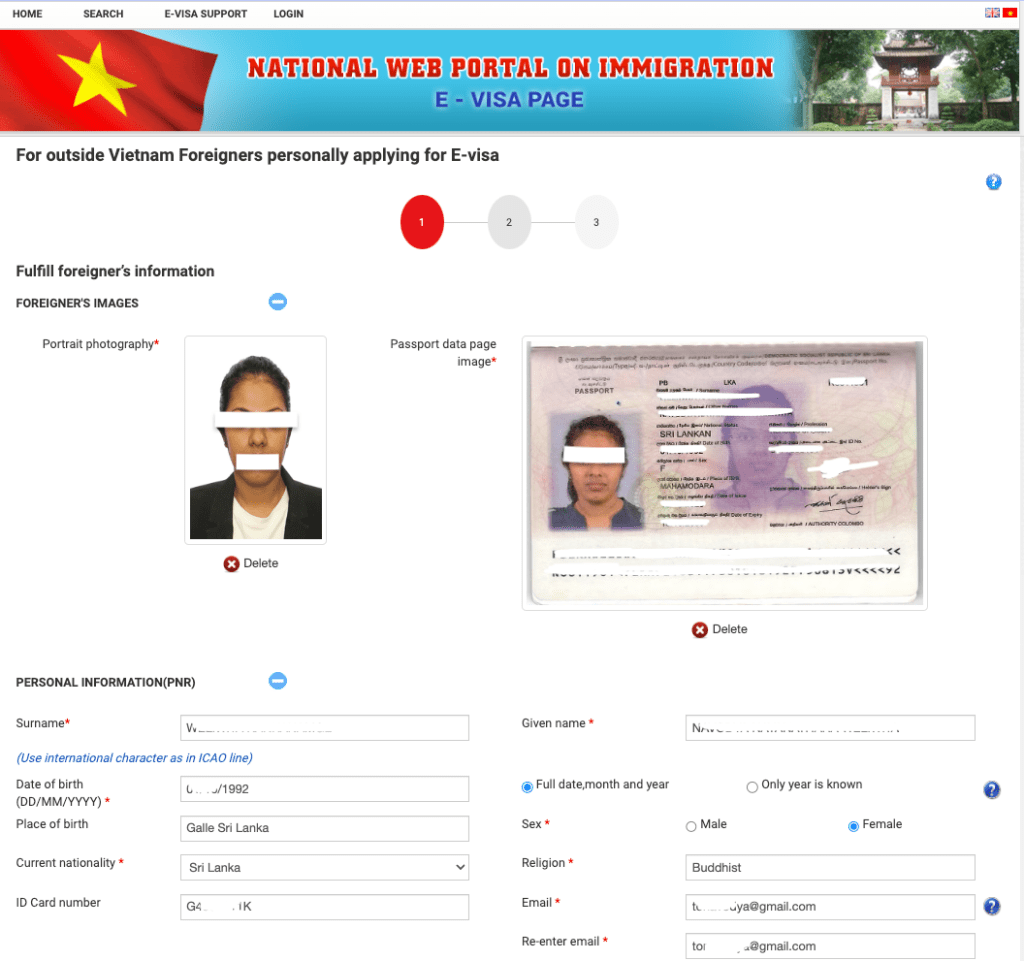
Step 4: Passport and visa details
Enter your passport details accurately. Select whether you need a single or multiple-entry visa, and choose the from and to dates you are requesting, including your travel date. Note that even though you pick dates here, the reviewing officer decides the actual validity.
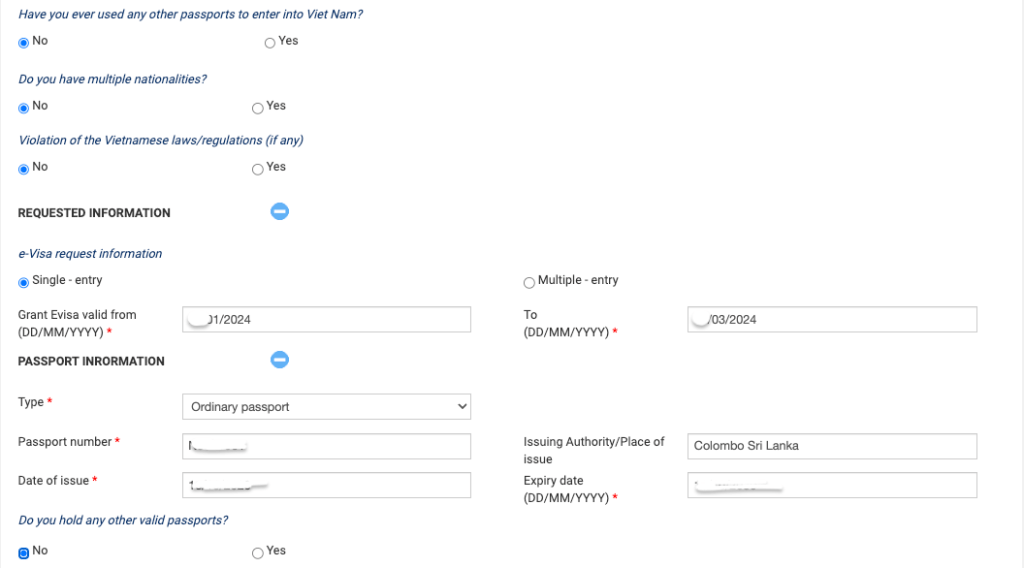
Step 5: Address and contact
Provide your permanent and contact address (use your Singapore address), an emergency contact, and your occupation and company details, including address and phone number.
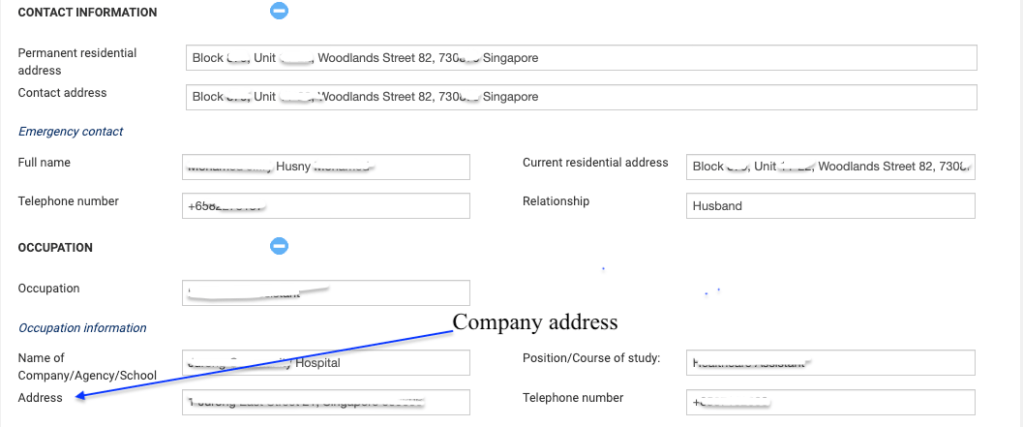
Step 6: Trip information
Provide the trip details: purpose, the port you will use to enter Vietnam, and the full address in Vietnam including the hotel name. You can use your Singapore or current mobile number with the country code. Leave the “Agency/Organization/Individual” part blank if it does not apply.
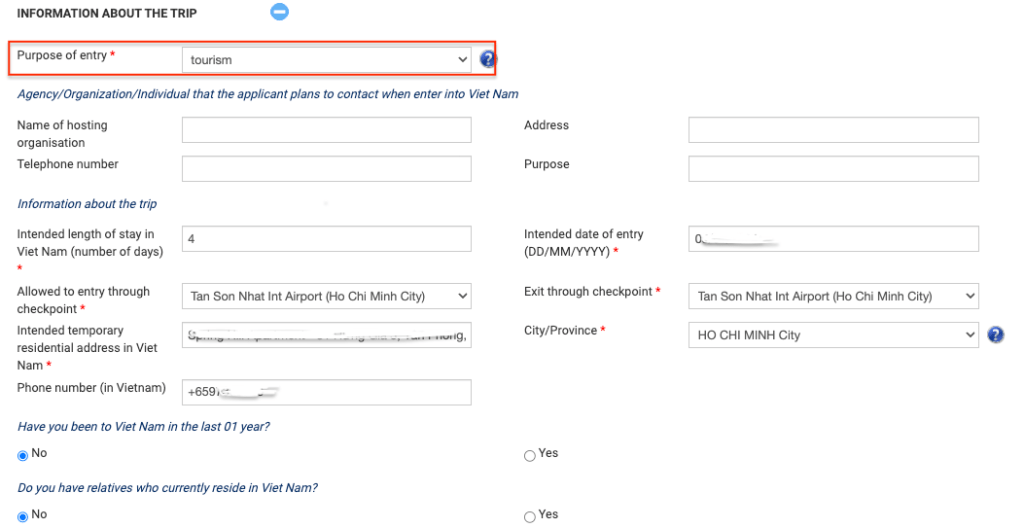
Step 7: Expenses and insurance
Provide your trip expenses (what you plan to spend) and insurance details (travel insurance is not mandatory but recommended). Then review the form.
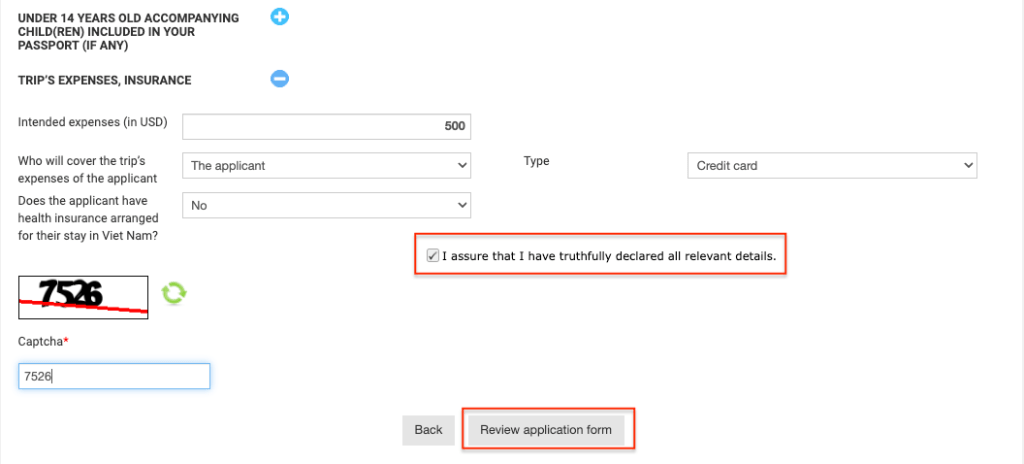
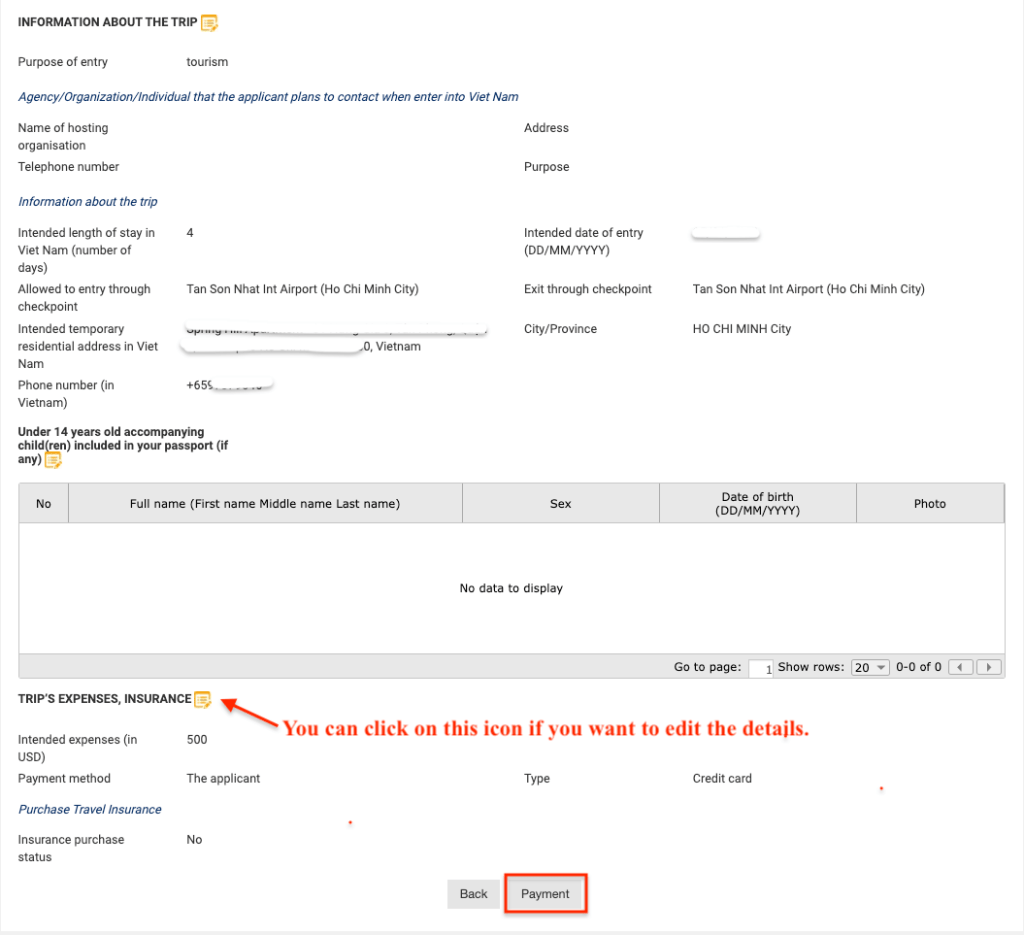
Step 8: Review everything
Carefully review all the details. Change anything entered incorrectly. When it is all correct, click Payment at the bottom of the review page.
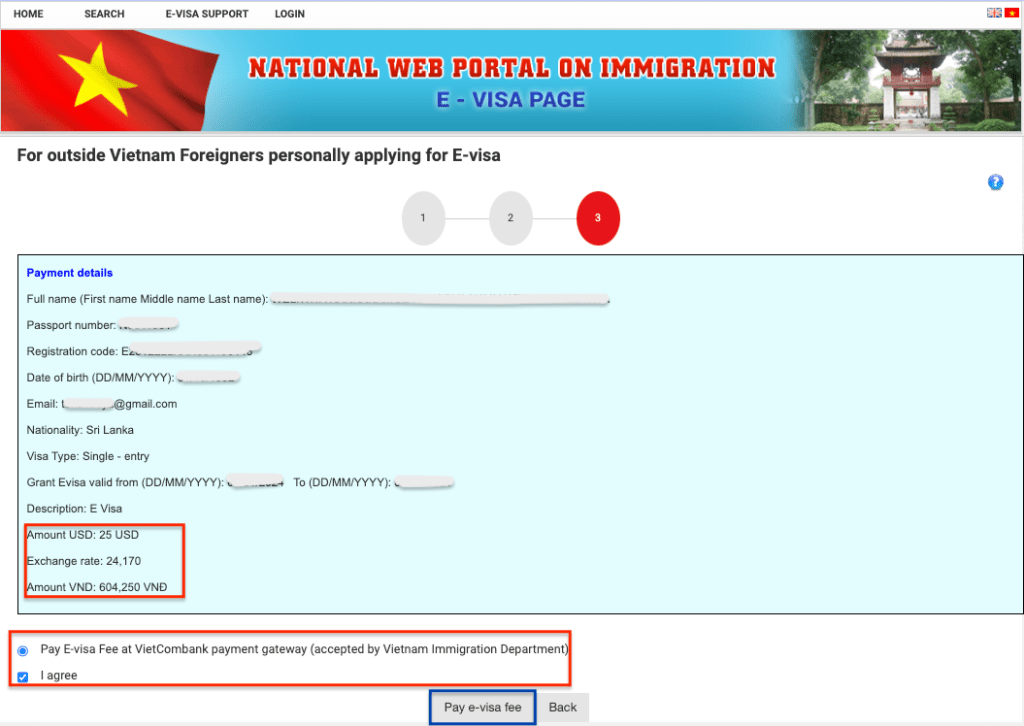
Step 9: See the fee and validity
Once you click Payment, you will see the visa fee in VND, and the validity you will get if the application is approved.
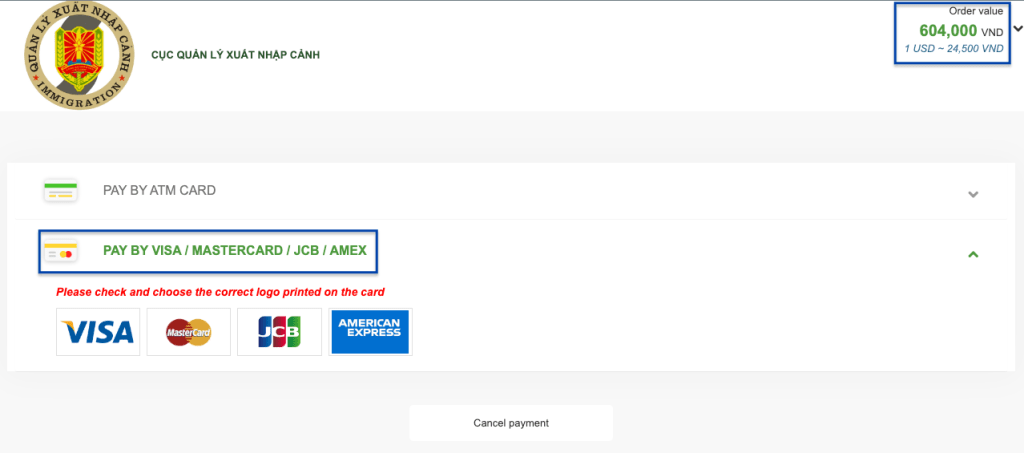
Step 10: Choose payment type
Select your payment type. Visa, Mastercard, or AMEX are common in Singapore.
A tip on payment: I use Wise for all payments, and through Wise you can pay in the local currency, VND in this case. Top up your Wise wallet, convert some SGD to VND, and you will see your VND wallet in Wise. You get a much better conversion rate, and you can use the Wise card in Vietnam too, with the money coming from your VND wallet. If you do not use Wise yet, here is my referral link to try it. It is a convenient way to spend in any country: https://wise.com/invite/ihpc/husnym2
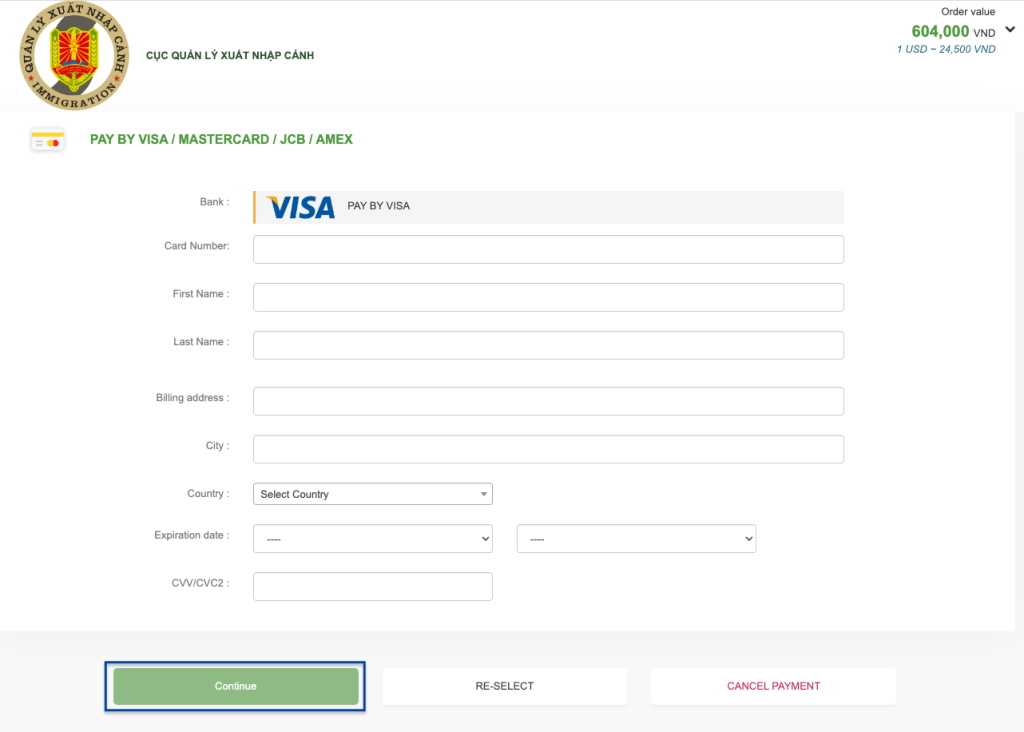
Step 11: Enter card details
Enter your Wise card details, or any other card you want to use. Click Continue, then read and agree to the terms and conditions.
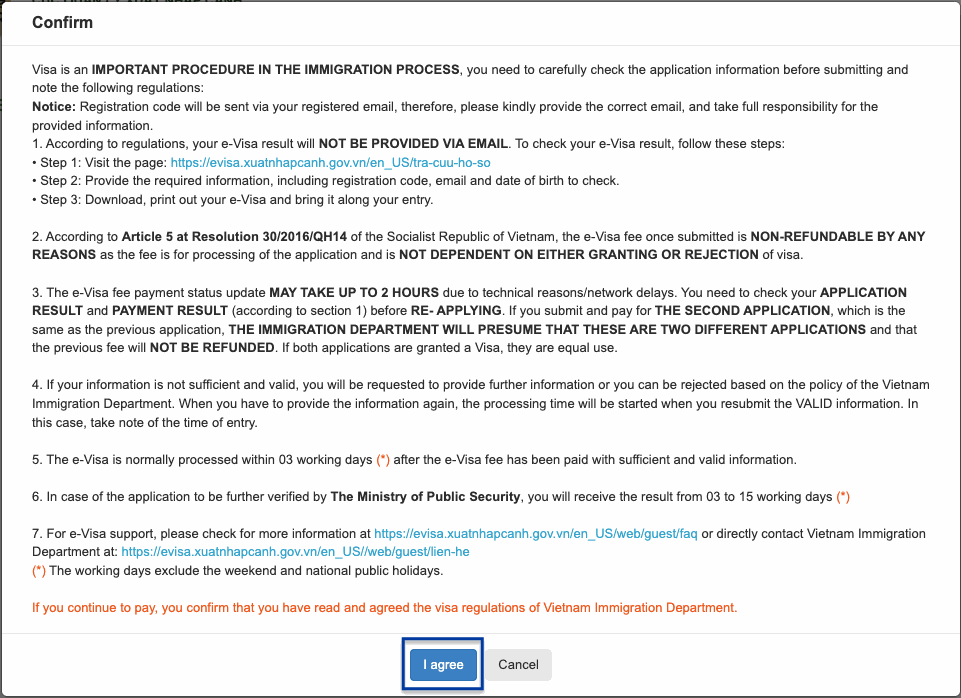
Step 12: Pay and confirm
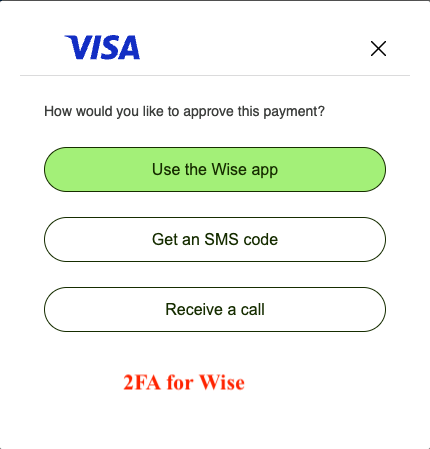
Pay for the visa and complete 2FA if prompted.
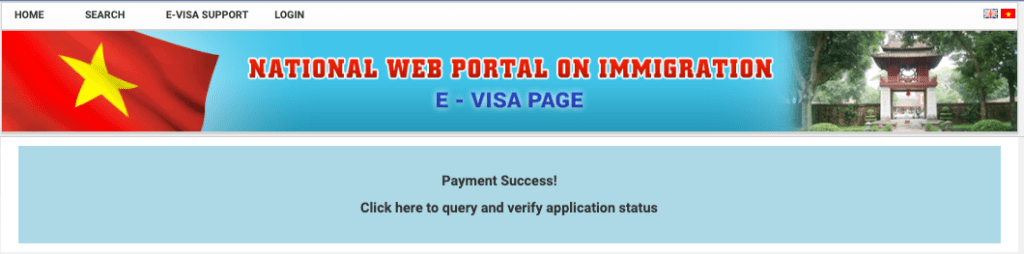
You will see a success message once the payment goes through.
Acknowledgement
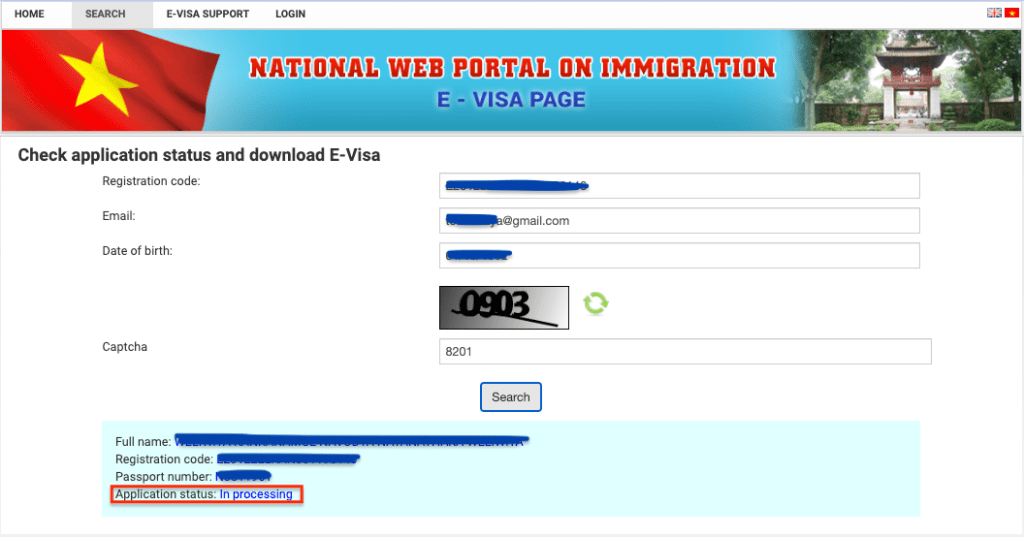
You will get an email with a registration code, which you use to check your visa status.
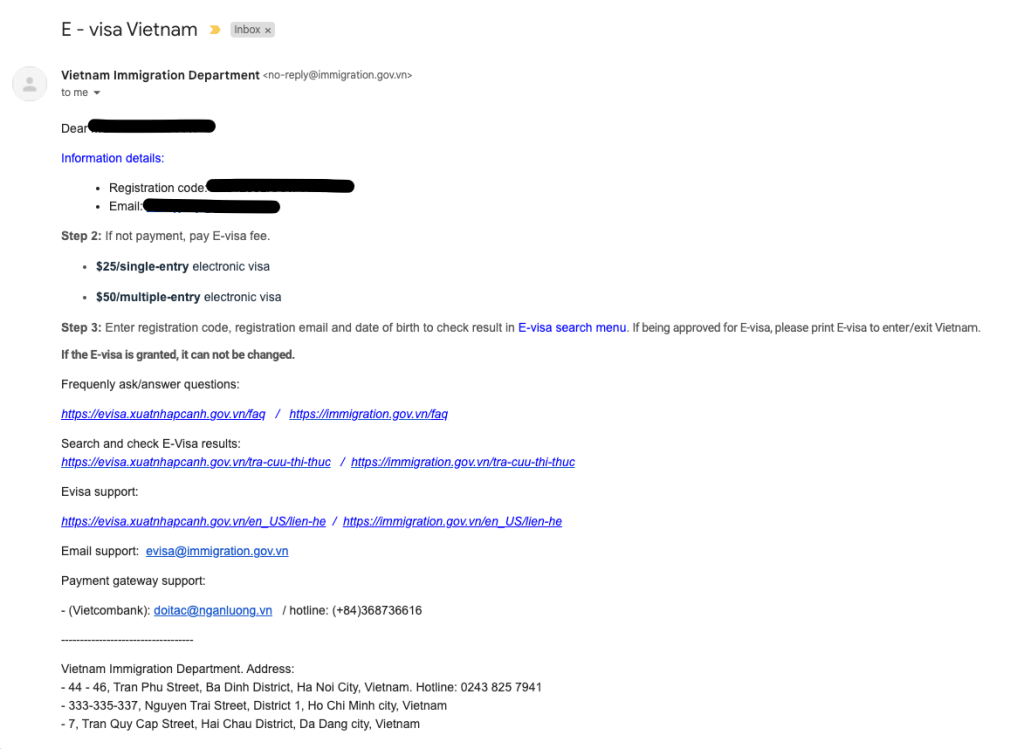
The result
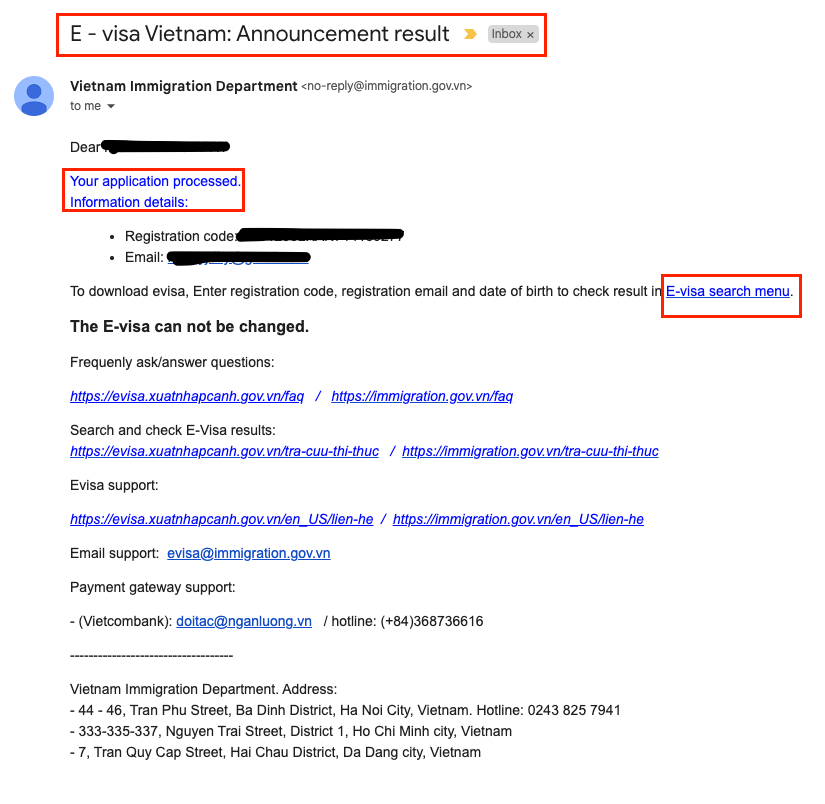
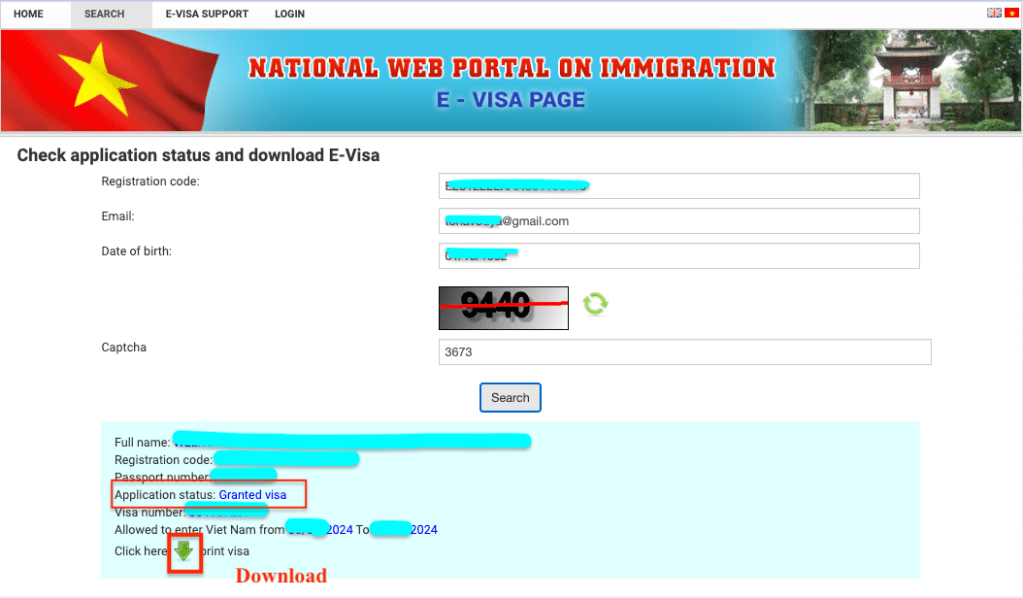
In most cases you will get an email like the one below within three working days. Use the registration code to check the status, and if it is granted, download it.
Your e-visa
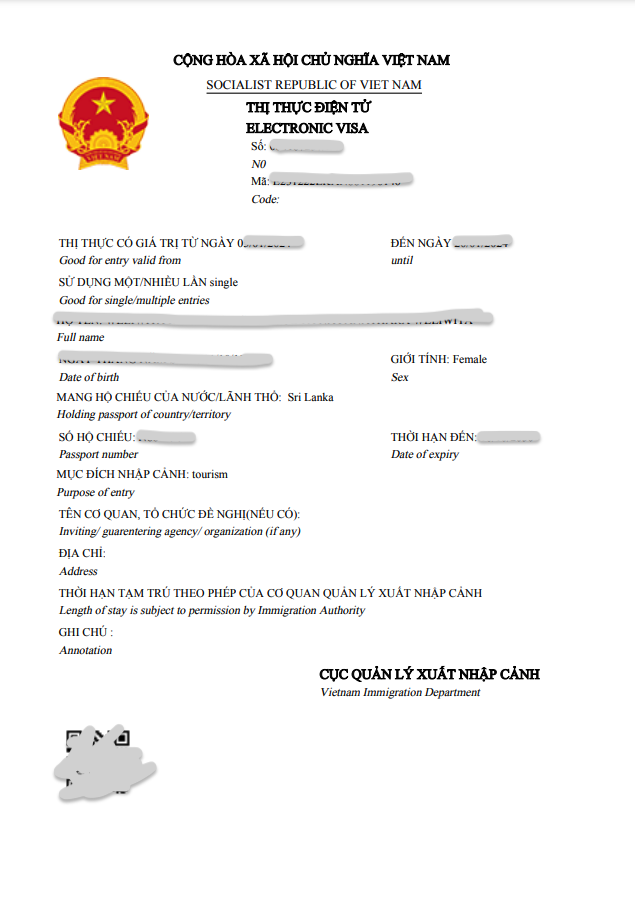
The e-visa looks like this.
That is it. Enjoy your trip. 🛫
Planning more trips from Singapore?
If you are exploring the region, I have written the same kind of guides for a couple of neighbours: visa-free Thailand and a multiple-entry Malaysia visa.
The Vietnam e-visa is one of the simpler ones. Prepare the photo and passport in the right sizes, take it step by step, and you will have it in about three days.
If this guide made your application easier, please rate the article with the stars just below. It takes a second and helps other travellers find it.
That’s it for today, guys. Thank You for Reading! I hope you found this article informative and useful.
If you think it could benefit others, please share it on your social media networks with friends and family who might also appreciate it.