A Step-by-Step Guide on How to Get an Indonesia Visa in 2025
Indonesia is a tropical paradise that attracts millions of visitors every year, whether it’s the vibrant beaches of Bali or a quick weekend getaway to Batam. But before you pack your bags, one important thing to check is whether you need a visa to enter Indonesia.
In this guide, I’ll walk you through everything you need to know about obtaining an Indonesian visa in 2025, especially if you hold a passport that requires a visa in advance (i.e. Sri Lanka).
Whether you’re travelling from Singapore, Malaysia, Sri Lanka, or elsewhere, this step-by-step guide will help you complete the visa process smoothly and avoid surprises at the airport or ferry terminal.
Our Trip
I recently visited Indonesia (July 2025) with my wife. We spent 9 days in Bali, flying from Singapore to Denpasar International Airport (DPS). Whether you’re flying to Bali, Jakarta, or taking a ferry to Batam, this article will guide you through the step-by-step process of obtaining your Indonesian visa.
Ad
Are you interested in investing in Stocks or Stock Options?
I have recently released two courses and also wrapped a podcast in Sinhala. Please check them out if you are interested
Stock Market Basics in Sinhala: https://elearning.lk/course/stock-market-basics-in-sinhala
Master Stock Options in Sinhala: https://www.udemy.com/course/master-stock-options-in-sinhala/?couponCode=EARNINGSSEASON
https://www.youtube.com/watch?v=GCt5Xt64Ma8&t=2893s
Prepare Your Documents
Passport
- A clear photo of the bio page (JPG format).
Biometric Photo
- A soft copy (JPG format) of a passport-size photo taken within six months.
Bank Statements
- The last three bank statements indicate that you have sufficient funds (USD 2000) for the trip.
- You can download bank statements from your internet banking. (i.e. DBS, StanChart)
A Hotel Address in Indonesia
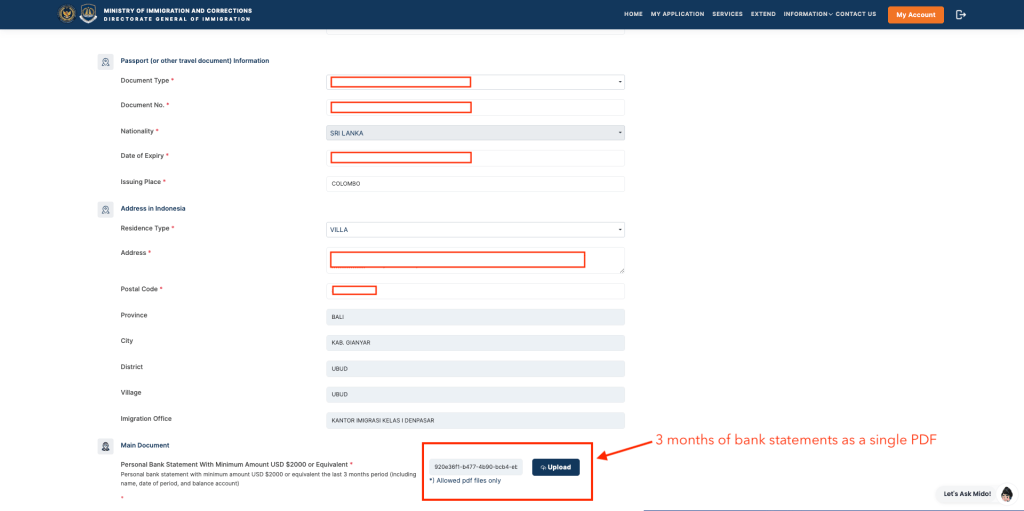
- You must provide a hotel address in Indonesia. But there is NO place to attach the hotel booking.
Sponsorship Letter for Spouse & Marriage Certificate
- If your spouse has a separate bank account with a balance of over $2,000, you can directly attach your spouse’s bank statement when completing the visa form for your spouse.
- However, if you are the one who sponsors your family (spouse + kids) for the trip, you need a letter indicating this. Please refer to the sample letter here.
- In the same letter, on another page, add a photo of your English-translated marriage certificate to prove your relationship.
Fee and Processing Time
The fee is 1 million IDR, equivalent to approximately 80 Singapore Dollars. Took us five working days to process.
Step 01:
Create an Account in the Immigration Portal. (Do not need to create if you have already created)
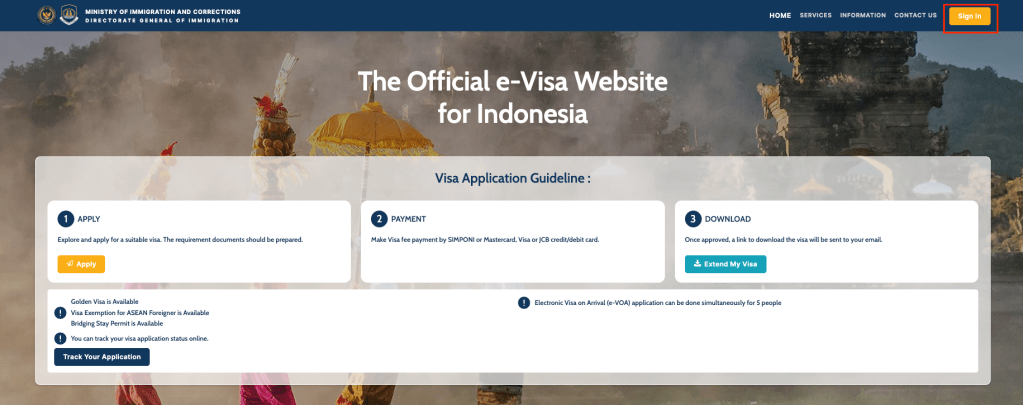
- https://evisa.imigrasi.go.id/
- Click on “Sign In”
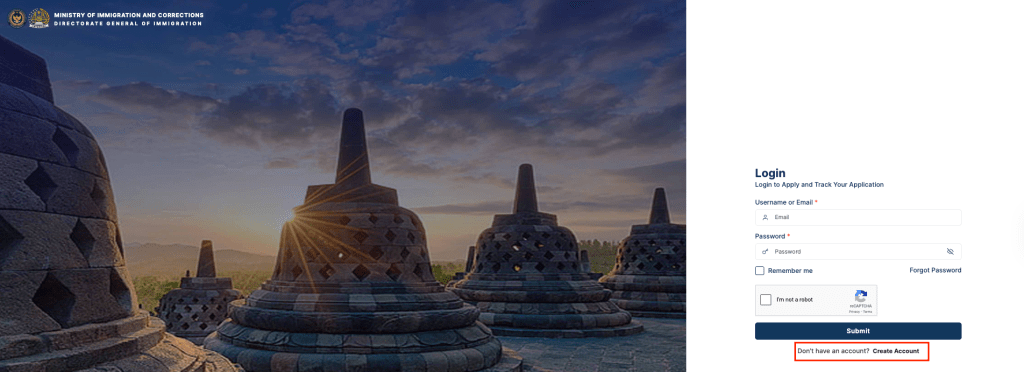
- Click on “Create Account”
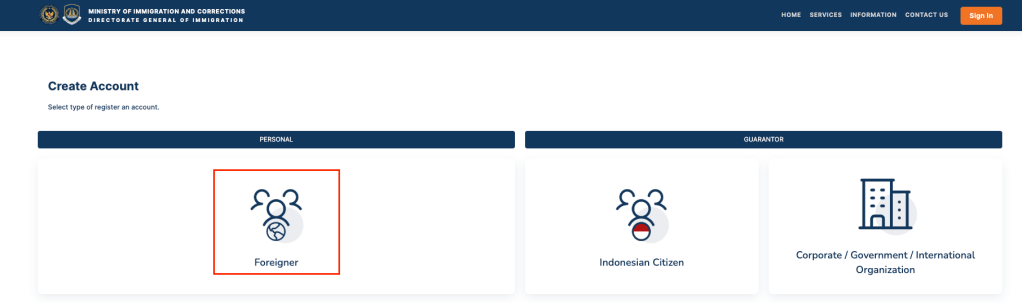
- Select “Foreigner”
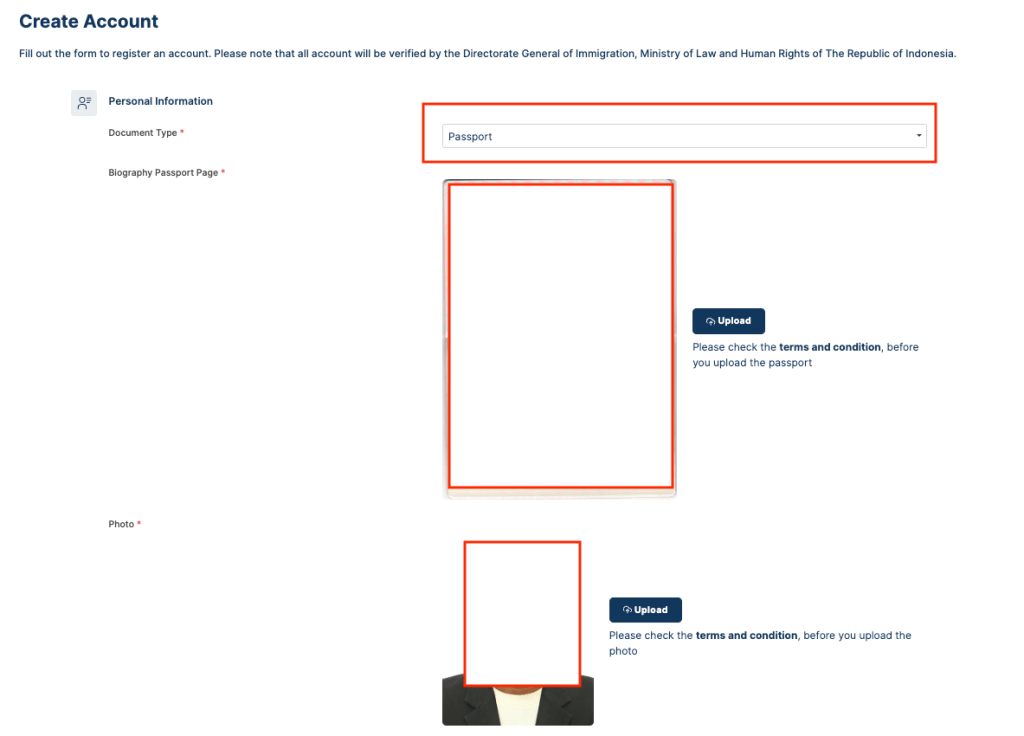
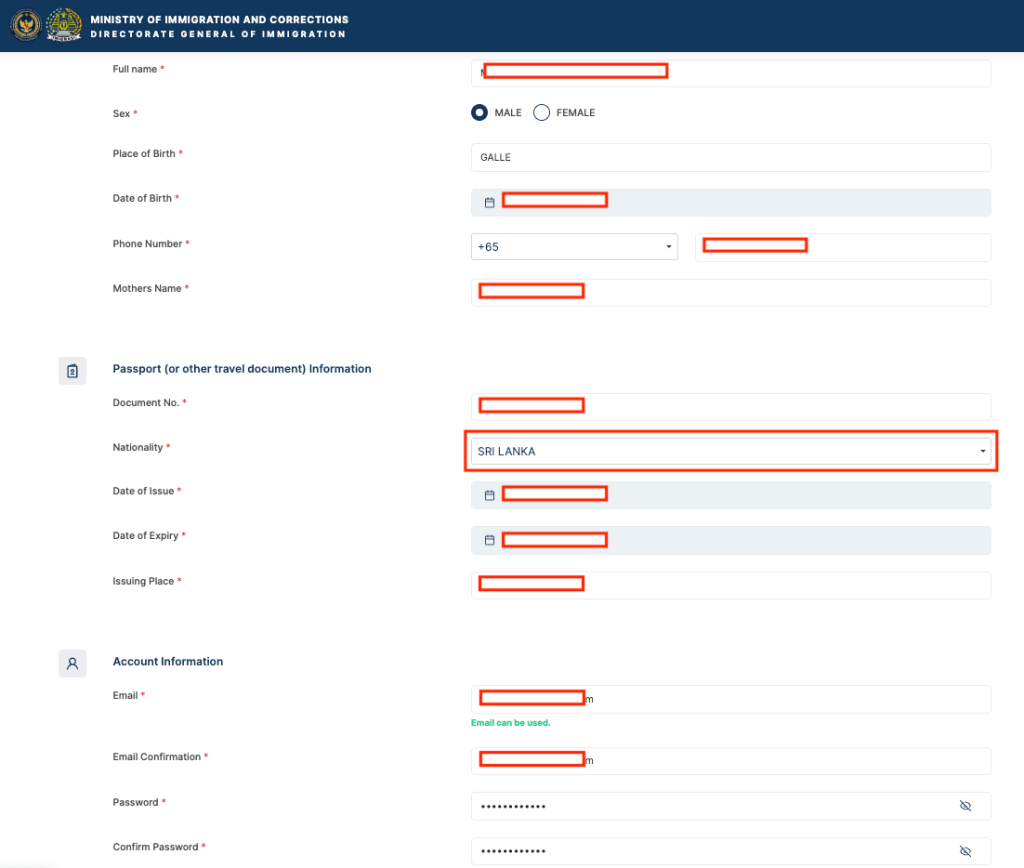
- Enter your details and upload a photo of you and a photo of your passport bio page.
- Click on ‘Create’ and then ‘Activate via Email’ (you will receive an email to activate your account).
See the screenshot below.
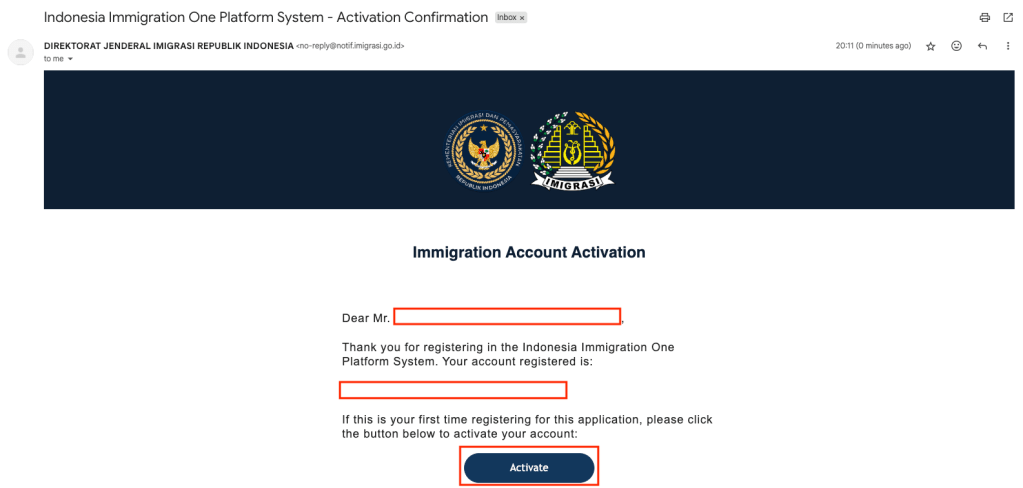
Activate via Email
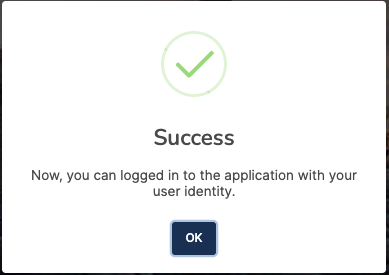
Account Activated
Now the account creation and activation are successful.
Step 02:
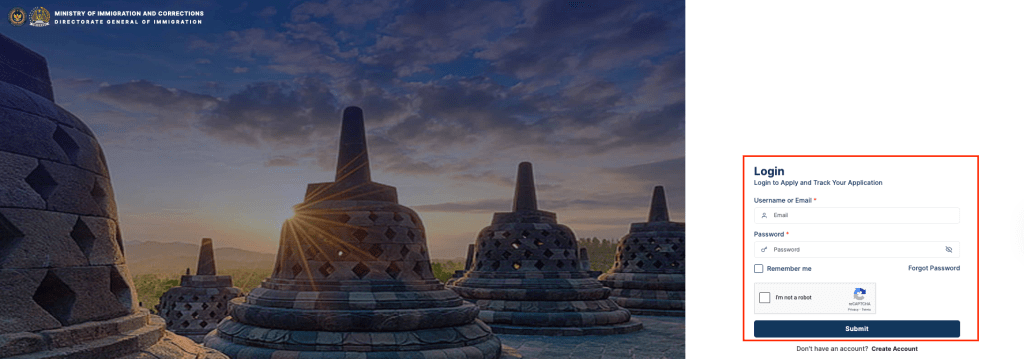
Navigate to the visa portal and click on “Sign In.” Enter your email and the password you set during account creation and log in to the system.
Click on “Apply,” select your nationality (which is selected by default), and then choose the purpose of your visit and the type of visa. Then click on “Detail & Apply”
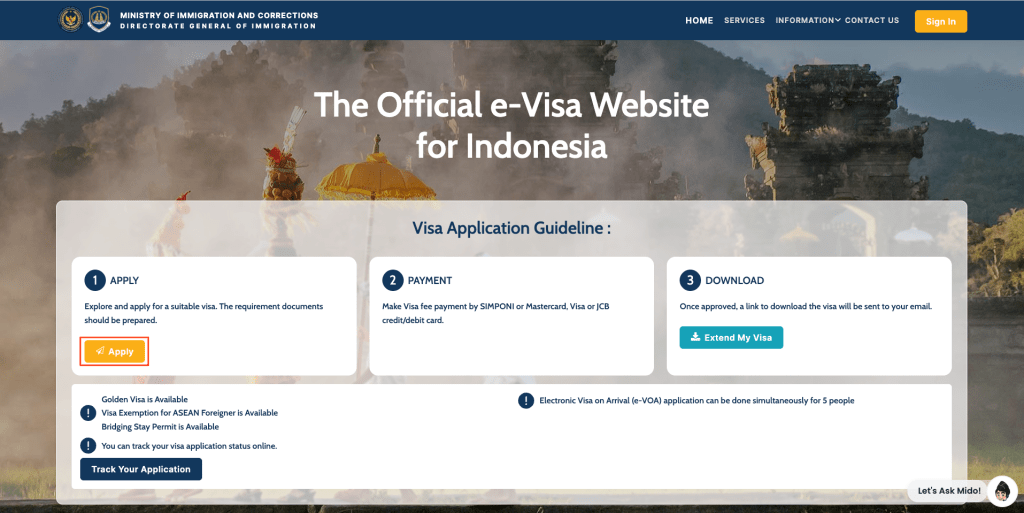
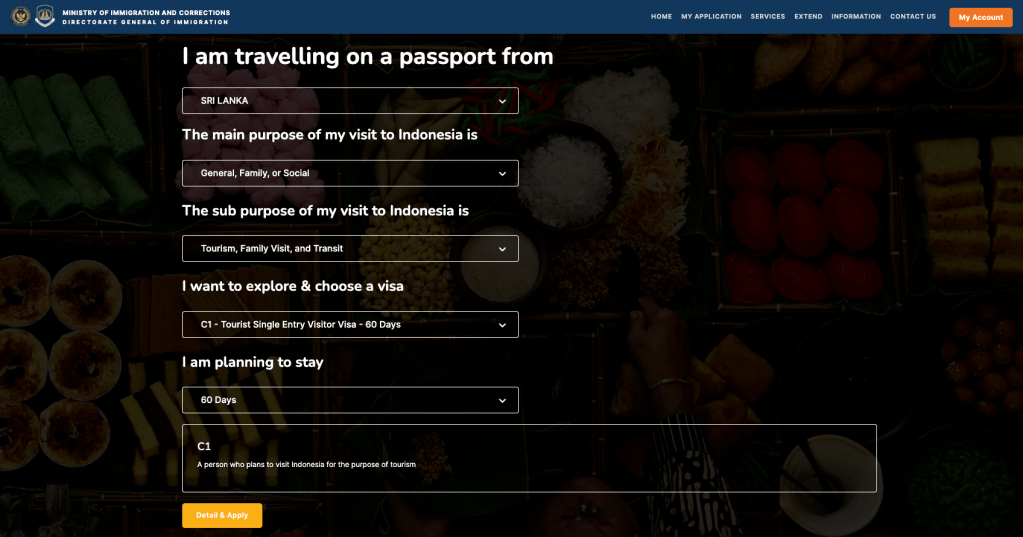
Click on “Apply” on the visa details page.
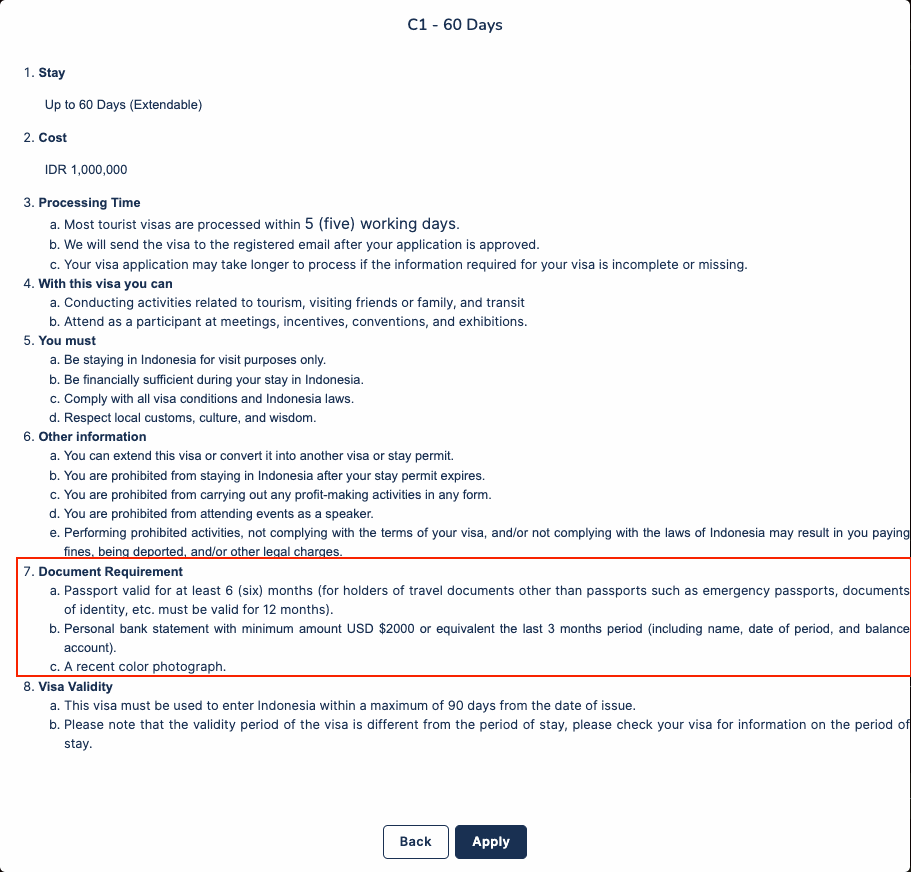
Step 03:
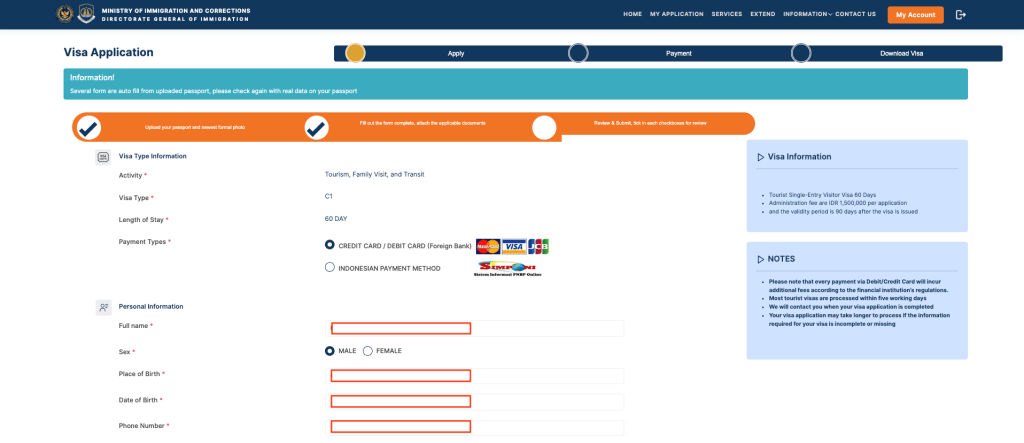
Although you have provided all your details during account creation, you still need to upload a photo of your bio page, a passport-size photo, and enter all details, including the method of payment for the visa. Here, you need to upload 3 months of your bank statement as well. Then click on “Next”
Note: When filling out the visa application for your spouse or children, if you are sponsoring them, please upload the letter that we prepared instead of a bank statement.
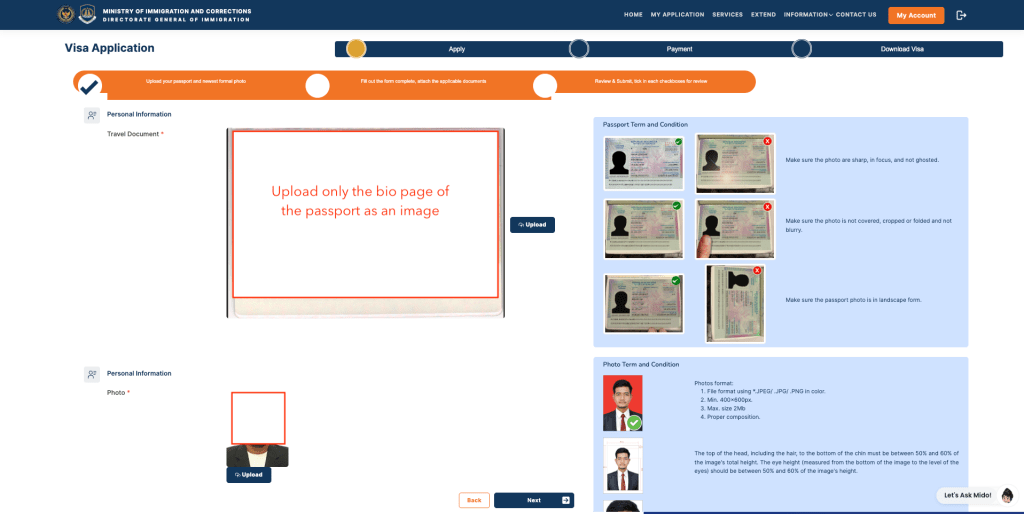
Step 04:
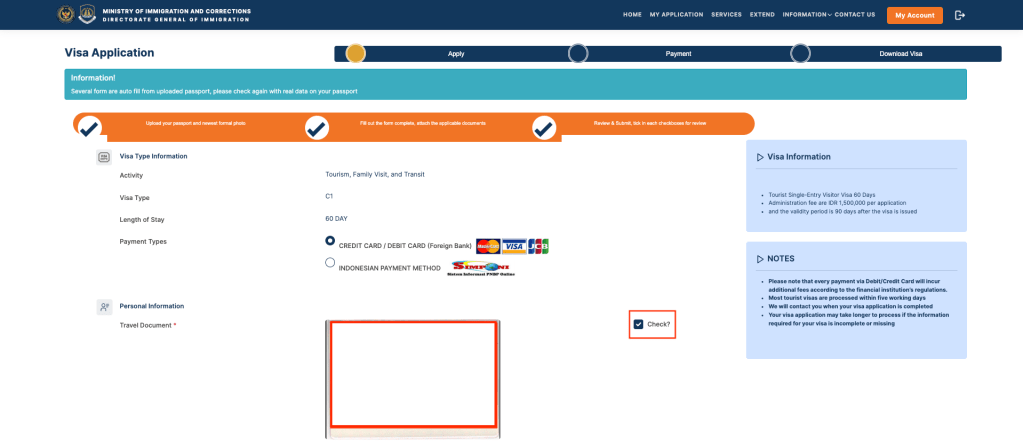
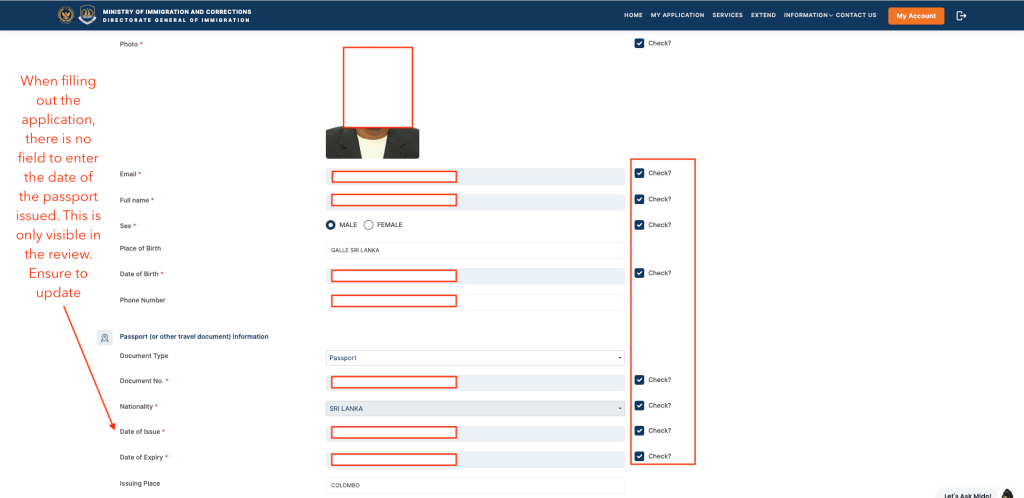
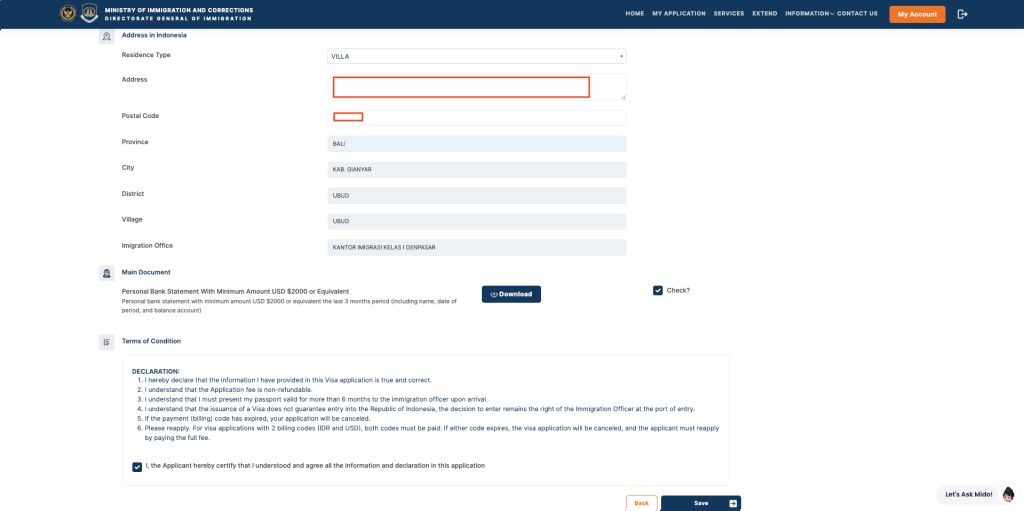
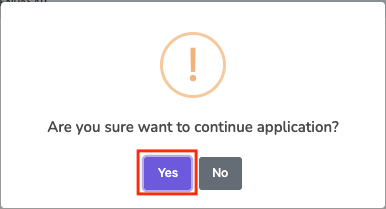
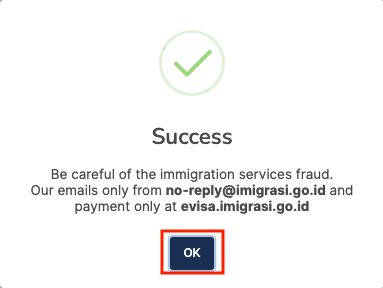
Review all the details you have added and click Save.
Step 05:
You can see your application under “My Application” with “Waiting for Payment” Status.
Click on “Details” and complete the payment.
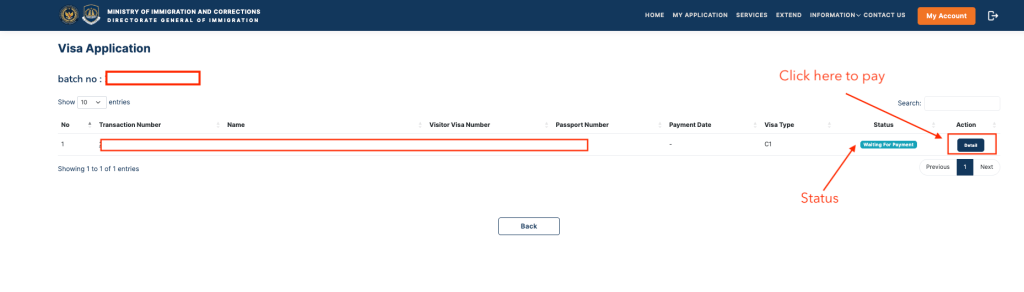
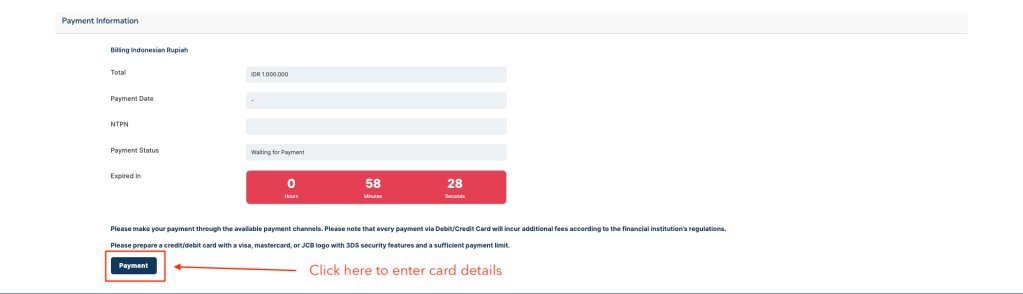
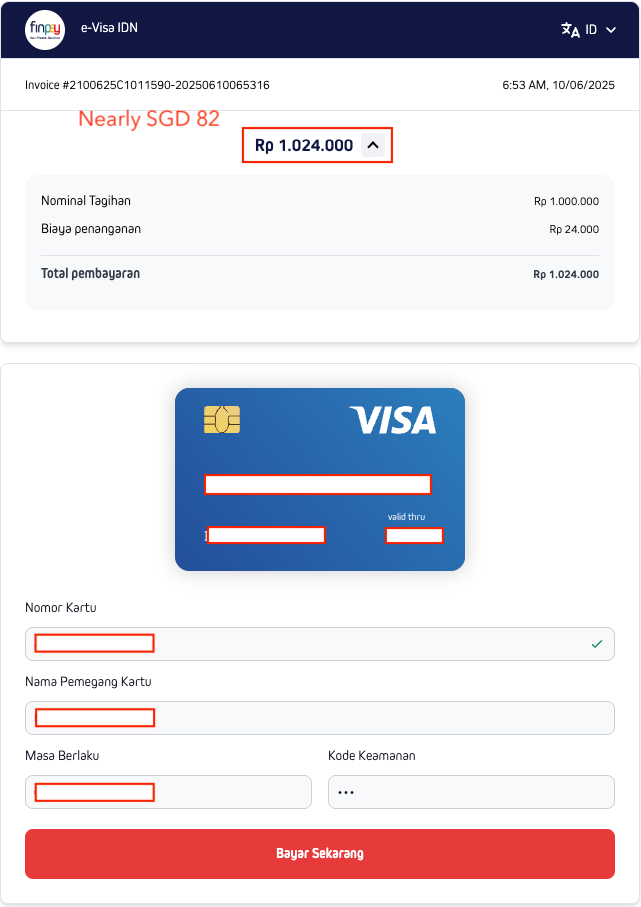
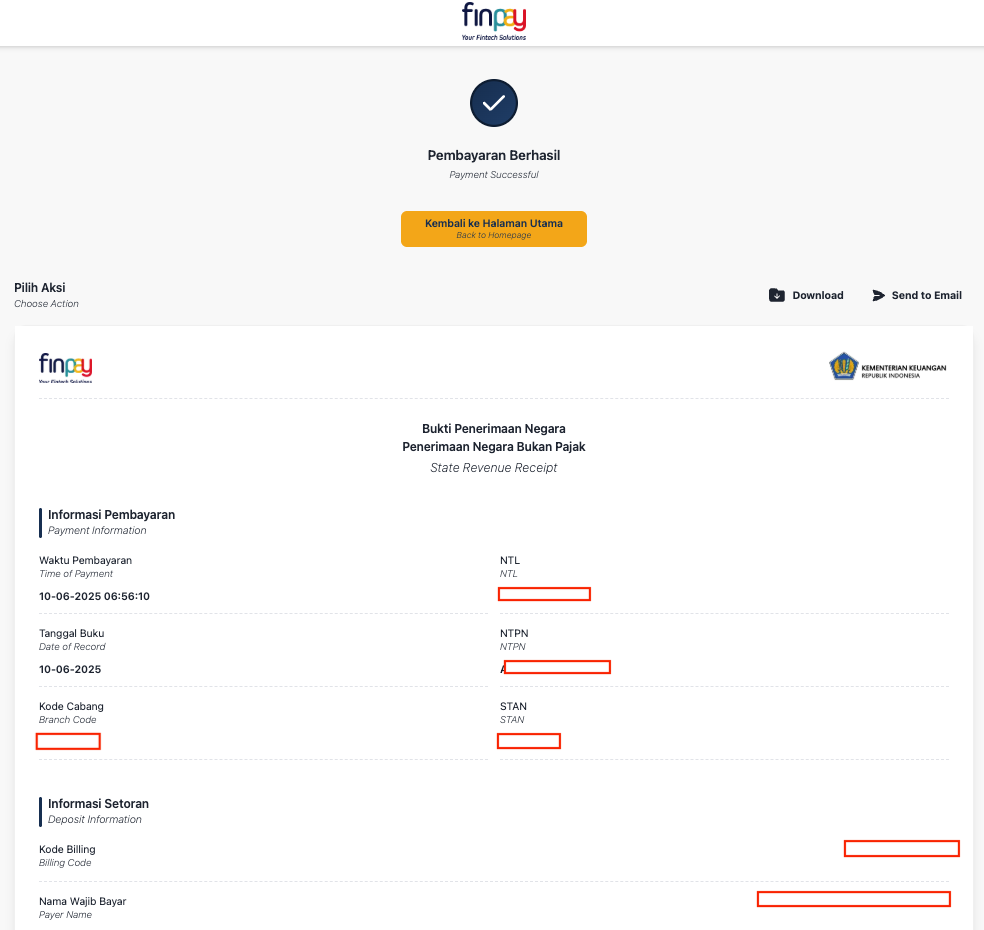
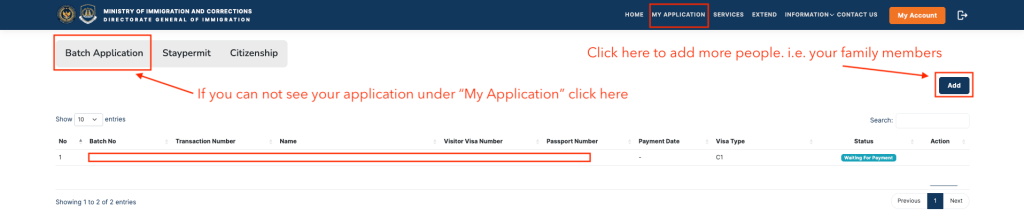
Click on “Add” to add more people (family members)

Status before the payment

Status after the payment
Step 06:
Once visa is approved, you will receive an email. Download the visa
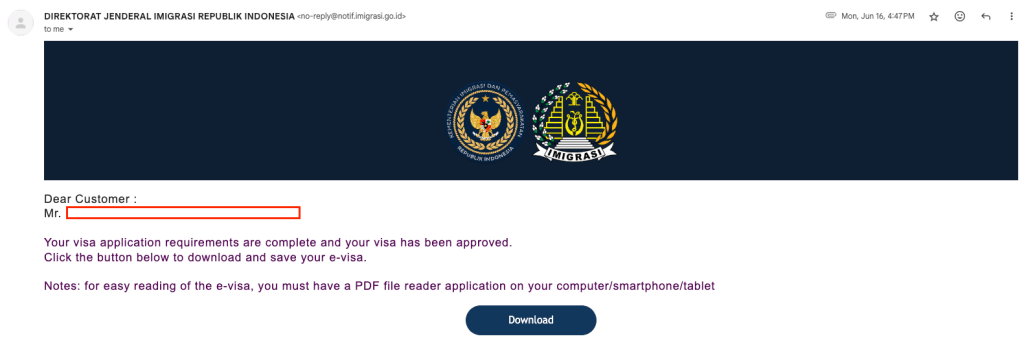
The email received after approval
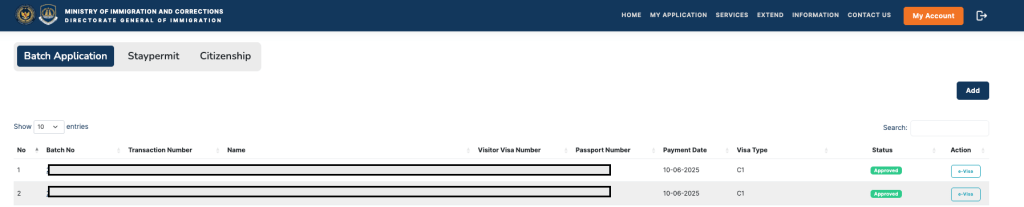
Status after approved
Enjoy your trip. 🛫
That’s it for today, guys. Thank You for Reading! I hope you found this article informative and useful.
If you think it could benefit others, please share it on your social media networks with friends and family who might also appreciate it.